Archive for January, 2009

Chocolate Stout Braised Beef Short Ribs with Honey Baby Turnips

January 28, 2009

Brooklyn Brewery’s Black Chocolate Stout is hands-down one of the best seasonal beers that I have ever tasted. Crafted from a special blend of roasted malts, the stout is pleasantly bitter with a dark chocolate undertone that feels luscious in the mouth. This is also very good looking beer. Poured into a tall glass, Black Chocolate Stout is extremely dark, like Coca-Cola, and forms several inches of a thick, foamy head that quickly settles into the beer. I suggest that you track down some for yourself before the winter season is over. A word of caution- at 10.1% alcohol, this stout can pack quite a punch so pace yourself. Click this post’s title to view Brooklyn Brewery’s website.

After knocking back a few bottles, I became so enamored with Black Chocolate Stout that I used it to braise some beautiful beef short ribs that I had picked up from the grocery over the weekend. The results were outstanding. Of course, you can substitute any dark beer in this recipe but you will miss out on the subtle interplay between the stout’s bittersweet black chocolate flavor and the smokiness of the ancho chile powder that seasons the braising liquid. These shorts ribs are incredibly rich and perfect for dinner on a snowy evening.

CHOCOLATE STOUT BRAISED BEEF SHORT RIBS WITH HONEY BABY TURNIPS

For the short ribs:

4 pounds beef short ribs, cut into 2 inch pieces
1 teaspoon black pepper
1/2 teaspoon kosher salt
2 teaspoons vegetable oil
1 pound frozen pearl onions (do not thaw)
4 garlic cloves, crushed
1 bottle Brooklyn Brewery Black Chocolate Stout or other dark beer
1 tablespoon ancho chile powder
2 teaspoons dried thyme
1 bay leaf
2-3 cups low sodium beef stock

Preheat oven to 375 degrees.

Heat oil in heavy 12″ skillet over medium high heat.

Season ribs on all sides with pepper and salt.

Sear ribs on all sides. Remove ribs to a roasting pan big enough to hold them in one layer. Make sure to place ribs bone side up in the pan.

Lower heat to medium. Drain the excess fat from the skillet so that almost none is left.

Add the frozen pearl onions and the garlic to the skillet. Saute for a couple of minutes. Stir frequently to avoid burning the garlic.

Deglaze the skillet with the beer and bring to a quick boil. As the beer comes up to a boil, scrape up any brown bits.

Add the chile powder, thyme and bay leaf.

Pour the onion and beer mixture over the short ribs.

Add enough beef stock to just cover the ribs.

Cover the roasting pan tightly with aluminum foil.

Braise the ribs in the oven for three hours.

When the ribs are done braising, use tongs to remove the ribs to a warm platter or bowl. Cover with the foil used for the roasting pan to keep the ribs warm while you prepare the sauce.

Discard the bay leaf.

Place the roasting pan on the stove over high heat and boil the sauce until it reduces by at least half, about ten minutes. Stir the sauce frequently to avoid burning the onions. If you would like a thicker sauce, boil it longer until you reach the desired consistency.

At this point, you may remove the bones from the ribs- they should fall off quite easily. Or, you may serve the ribs with the bone. It’s up to you.

Pour the sauce over the ribs and serve immediately.

For the turnips:

1 1/2 pounds baby turnips
2 tablespoons unsalted butter
2 teaspoons honey
3/4 cup low sodium chicken broth
1/4 teaspoon salt

Peel the baby turnips and cut into halves or quarters, depending on the size.

Melt the butter in a small saucepan over medium heat. Add the honey and stir well.

Add the turnips and stir to coat each turnip with the melted butter and honey.

Add the broth and salt.

Bring to a boil then reduce heat to low and cover. Simmer until the turnips are just fork tender, about 25 minutes.

Remove the lid and quickly boil off any remaining liquid. The turnips will brown a little bit but make sure to stir a few times to avoid burning.

Using the back of a spoon, gently mash a few of the turnips. Leave some whole.

Spoon into a bowl and serve immediately with the short ribs.

Serves 4.

Vegetarian Envy

January 28, 2009

Here’s another post that originally appeared on World Wide Webers. Click on this post’s title to view the original.

I am not a vegetarian but I hold them in the highest regard. I wish I possessed the willpower and unerring commitment to better health, saving the planet and/or animal rights exhibited by most vegetarians. With only a few exceptions (and I shall not name names), my vegetarian pals are svelte, disciplined not only at the table but in life as well, and concerned with the well-being of the planet and her inhabitants. These are good people and sometimes I wonder if their goodness is a consequence of their vegetarianism or the reason why they became vegetarians in the first place. I, on the other hand, become a salivating, quivery lump whenever I smell bacon. And even though I love animals (not including birds or squirrels), I have no moral qualms about roasting them and slathering them in gravy. Every once in a while, usually after sharing a meal with one particular vegetarian friend (who invariably orders a salad with fat free dressing on the side… oh, the restraint!), I feel inspired to be a better person by cooking a meal composed solely of what grows in the soil. Should you someday also be so inspired, I invite you to prepare this delicious Asian influenced noodle bowl. This is a fun, slurpy dish with big flavors and lots of vitamins. Your taste buds and animals everywhere will thank you.

BOK CHOY NOODLE BOWL

16 ounces udon noodles or your favorite Asian noodle
5 cups low sodium vegetable broth
1 whole star anise
1 tablespoon grated or crushed ginger
2 teaspoons crushed garlic
1/4 cup soy sauce
2 teaspoons dark sesame oil
1 carrot, julienned (cut into 2 inch long matchstick sized pieces)
6 ounces of baby corn, each piece cut in half lengthwise
4 scallions, cut into one inch pieces
3 cups of chopped bok choy (do not pack down the bok choy when measuring)

In a large soup pot, bring broth to a low boil over high heat. Add star anise, ginger, garlic, soy sauce and sesame oil. Add the carrots. Cover, lower heat to medium and continue on a low boil until the noodles are ready.

Meanwhile, in a separate pot, cook the noodles according to the package directions, except undercook by 1-2 minutes. Drain thoroughly. If the noodles require less than 3 minutes to cook, do not cook them.

Add the baby corn to the broth. Add the noodles. If the noodles are uncooked, then boil for as long as directed by the package directions. (Tip: You might need to add an extra half-cup or so of broth if you use uncooked noodles and they soak up some of liquid.) Add the bok choy and scallions when the noodles are ready. Lower heat to low and simmer uncovered for a minute or two until the bok choy is wilted.

Ladle noodles, vegetables and a generous portion of broth into deep bowls. Serve steaming hot. Whomever gets the piece of star anise in their bowl has to stand up and sing a song for the amusement of everyone else.

At the table, try setting out various garnishes so that your guests can customize their noodles. Here are some tasty options:

soy sauce
sesame oil
chopped cilantro
finely chopped or grated lemongrass
chili garlic sauce
lime wedges
thinly sliced daikon radishes
toasted sesame seeds
bean sprouts
cubed, firm tofu (bring to room temperature before serving)

Serves 4.

Cake. It’s Good Stuff.

January 17, 2009

There’s something about cake that makes everyone happy. An occasion requiring cake is sure to be a pleasant occasion. Even in its most plebeian form (meaning prepackaged and covered in neon frosting containing more chemicals than natural ingredients), cake can be a powerful elixir against drudgery and ennui. Think about those long afternoons when you’re toiling away at your office, longing to be at home in your pajamas (or just about anywhere else, for that matter), falling asleep on top of your computer. You decide that you need coffee. You head to the breakroom. What do you see? Can it be? Could it possibly be? Yes, it is. Hallelujah, it is. Some kind soul has put out a cake to share. You eat a slice with your cup of coffee. A big slice. And you instantly feel better, like you can somehow slog your way through until the closing bell rings. Mmmm. Cake. Although it’s not as good as a vacation day or Prozac, it sure can lift your spirits when you’re faced with an afternoon of editing spreadsheets or returning calls to people that you only pretend to like. You know what I’m talking about.

This poundcake is simple to prepare but will impress with its sweet, intriguing flavor. Orange adds freshness and almonds contribute a nutty richness. But it’s the cardamom that will have everyone reaching for seconds and trying to guess your secret ingredient.

ORANGE POUNDCAKE WITH SUGARED ALMONDS

For the cake:

2 cups softened unsalted butter
3 cups white sugar
6 extra large eggs
2 teaspoons vanilla extract
1 1/2 teaspoons ground cardamom
1 tablespoon orange zest
3 cups sifted flour
1 cup light cream

For the glaze:

1 cup orange juice
1 cup white sugar
1/4 teaspoon ground cardamom

For the topping:

1 tablespoon cold unsalted butter
3/4 cup unsalted sliced almonds
1/8 cup turbinado sugar

Preheat the oven to 275 degrees.

Grease and flour a bundt pan.

In a large bowl, cream together the butter and sugar until light and fluffy.

Add all of the eggs at once. Cream the eggs into the sugar mixture until smooth and pale yellow.

Add the vanilla extract, cardamom and orange zest. Mix thoroughly.

Add all of the flour. Pour the cream on top.

Mix thoroughly until very smooth. Batter will be very thick.

Pour into prepared bundt pan. Smooth top with a rubber spatula.

Bake for 60 minutes. Then turn up oven to 350 degrees and bake for another 20 minutes

While the cake is baking, combine glaze ingredients in a small saucepan. Boil until sugar is completely dissolved and liquid becomes syrupy, about ten minutes. Remove from heat and allow to cool while cake finishes baking.

When cake is finished baking, allow to cool in the pan for 10 minutes before turning out onto a serving plate.

Place strips of wax paper around the base of the cake to cover the exposed plate edges. Gently lift up the bottom of the cake to slide the edges of the paper underneath about half an inch.

Use a spoon to drizzle the cooled glaze all over the cake. The excess will drip off the cake onto the wax paper. You can scoop it up and drizzle it back over the cake, if you wish.

While the glaze is setting, melt the tablespoon of butter in a small saute pan over medium high heat.

Add the almonds. Stir until the almonds are coated in butter.

Add the turbinado sugar. Stir and cook just until the sugar crystals start to melt then remove from heat.

Using a spoon, spoon the sugared almonds over the top of the cake.

Gently pull away the wax paper and discard.

Cake is ready to serve. Or, store covered on the counter for up to two days.

Serves 10.

The Fairy Godmother

January 17, 2009

Emily and Cat joined The A List so now they need to get their party on! You know what that means… cocktail time! These lovely ladies have been my BFFs since college and are friends so dear that they are like family. They are also my children’s godmothers. Or, as my darling daughter always calls them- the fairy godmothers, because they must be magical to always know exactly the right presents to send for Christmas and birthdays. So pop a cork and raise your glass to Emily and Cat!

THE FAIRY GODMOTHER

1/2 small, ripe honeydew melon
6 large raspberries
1 bottle dry champagne

A few hours before cocktail time, place the raspberries in a single layer on a small plate line with wax paper. Put in the freezer.

Peel and seed the honeydew. Puree until smooth in a blender.

Place one tablespoon of the honeydew puree in the bottom of a champagne flute. Top off with champagne. Drop a frozen raspberry into the glass to keep the drink cold.

Make a toast to friendship and enjoy.

Makes 6 cocktails.

Golden Split Pea Soup with Ham and Black Pepper Parmesan Biscuits

January 13, 2009

Let’s face it – split pea soup can be horrifying. Done wrong, split pea soup is sludgy, unpalatable and usually an unfortunate shade of green. Cooked my way, split pea soup is golden like sunshine and redolent with the savory deliciousness of ham and onion. This is a humble and hearty soup, perfect for dunking a black pepper parmesan biscuit. The biscuit’s peppery bite is the perfect compliment to the saltiness of the ham. And underneath it all are the earthy golden split peas, which break down into a rich, creamy porridge-like broth. This soup freezes and reheats well, so whip up a double batch and save some for a long winter’s night.

GOLDEN SPLIT PEA SOUP WITH HAM AND BLACK PEPPER PARMESAN BISCUITS

For the soup:

1 pound dried golden split peas
6-7 cups low sodium chicken or vegetable broth
1 tablespoon olive oil
1 celery stalk, finely diced
2 medium yellow onions, finely diced
1 carrot, finely diced
2 big garlic cloves, mashed to a paste
1 ham hock or 1 leftover ham bone with plenty of meat on it
1 bay leaf

Heat olive oil in large soup pot over medium heat.

Add celery, onions, carrots and garlic. Saute the vegetables until softened, about 15 minutes. Stir frequently to avoid sticking and burning the garlic.

Add six cups of broth and bring to a simmer.

Add peas. Stir thoroughly.

Add ham hock or ham bone. Add bay leaf.

Cover and simmer for one and a half hours, stirring occasionally. If the soup looks too thick for your liking, add another cup of broth.

Before serving, remove bay leaf and ham from the pot. Shred or cut meat off the ham bone into bite size pieces. Return ham pieces to the soup and stir thoroughly. Simmer for another few minutes.

Serve piping hot.

Serves 6.

For the biscuits:

3 cups sifted flour
4 teaspoons baking powder
1 teaspoon salt
3/4 cup grated parmesan
2 coarsely ground black pepper
1/2 cup vegetable shortening
1 cup milk

Preheat oven to 425 degrees.

Sift together the flour, baking powder, salt into a large mixing bowl.

Stir the parmesan and black pepper into the flour.

Use a pastry blender to cut the shortening into the flour until it resembles coarse cornmeal. Or, use your fingers to rub the shortening into the flour.

Slowly pour in the milk while stirring with a fork. Stir until a soft dough forms.

Sprinkle a little flour onto your work surface. Knead the dough for about 30 strokes.

Use your hands to pat out the dough on the board into a thick rectangle. Then use a rolling pin to roll out the rectangle until it is about 2/3 inch thick. Cut into twelve equal pieces.

Place biscuits on baking sheet one inch apart.

Back for 15 minutes, until golden brown.

Serve warm.

Makes 12 biscuits.

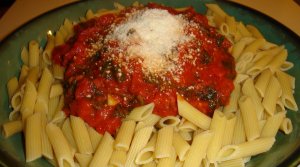
Penne with Greens and Tomatoes

January 13, 2009


Another recipe that appeared last year on World Wide Webers. Enjoy!

Today I will share with you a simple pasta dish that uses traditional Italian flavors, like tomatoes and spinach, but with a little twist that might be new to you. I imagine that Popeye would order this pasta dish if he went to Italy with Olive Oyl and Swee’Pea on a family vacation. I picture him strolling around a Roman piazza, puffing away on his corncob pipe and scoping out the nearest supply of spinach to bulk up his strength in case Bluto shows up.

Fortunately, we don’t need to travel to Italy to get real Italian flavor in our American kitchens. I have never been to Italy but I really enjoy that country’s tradition of combining dark, leafy greens with pasta. You’ve probably eaten sauteed spinach but have you ever tried cooking arugula? It’s delicious and pairs extremely well with garlic. Cooking arugula intensifies its peppery bite, which is beautifully tempered by the sweetness of tomatoes. Although I can’t promise that eating this dish will result in superhuman strength like Popeye, I can promise that it tastes great.

PENNE WITH GREENS AND TOMATOES

1 pound penne
1 tablespoon olive oil
4 garlic cloves, thinly slice
1 28 ounce can Italian style diced tomatoes
3 cups chopped spinach
1 cup chopped arugula
1 teaspoon kosher salt
1 teaspoon dried oregano
1/2 cup grated parmesan or pecorino romano or your favorite Italian cheese

Cook the penne according to package directions.

The sauce takes about the same amount to prepare as the penne takes to cook so begin the sauce while you wait for the pasta water to boil.

Heat the olive oil to medium in a large saute pan with high sides.

Add the garlic and saute until the garlic begins to turns golden brown on the edges, about three minutes. Stir the garlic frequently to avoid burning. (Tip: If the garlic begins to burn, lower the heat and add a tablespoon of the tomato juice from the canned tomatoes to stop the burning. Slowly bring the pan back up to medium heat once the burning stops.)

Add the spinach, arugula and salt. Cook the greens until just wilted, about 2 minutes.

Add the entire can of tomatoes, including the juice.

Stir in the oregano.

Let the sauce simmer gently until the pasta is done cooking.

Once the pasta is cooked, drain thoroughly but do not rinse. Pour into a large serving bowl and ladle the sauce over the pasta.

Sprinkle the cheese on top or pass the cheese at the table.

Serves 4 very generously.

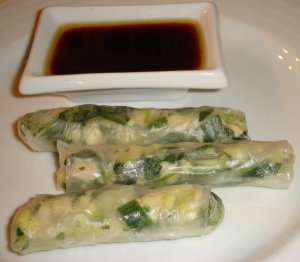
Lemongrass Chicken Spring Rolls with Sweet Sesame Dipping Sauce

January 8, 2009

These easy-to-assemble spring rolls are sure to be a big hit at your table. Finely grated ginger, garlic and lemongrass give a real kick to tender morsels of chicken. Don’t be put off by the idea of handling the rice paper wrappers because they look more delicate than they actually are. And they come in huge packages of at least fifty so it’s okay if you accidentally rip one. You’ll definitely have enough for this recipe. Try doubling or tripling this recipe for your next cocktail party.

LEMONGRASS CHICKEN SPRING ROLLS WITH SWEET SESAME DIPPING SAUCE

For the spring rolls:

16 round rice paper wrappers
1 cup cooked chicken, shredded or cut into very small pieces
1/2 cup of pea shoots or bean sprouts
1 cup shredded bok choy or cabbage
1/4 cup chopped bamboo shoots
2 scallions, chopped
1/2 cup shopped cilantro
1 tablespoon lemongrass, finely grated
3 garlic cloves, finely grated
1 inch knob of ginger, finely grated
1/2 teaspoon salt

For the dipping sauce:

2 tablespoons rice wine vinegar
4 tablespoons soy sauce
1 tablespoon dark sesame oil
1 tablespoon honey

Whisk together all of ingredients for the dipping sauce. Set aside until ready to use.

If using pea shoots, trim off most of the stems if they seem stringy or woody. If the shoots are longer than two inches, cut them in half.

Mix together all of the ingredients for the spring rolls, except the rice paper wrappers.

Fill a shallow bowl with very hot water.

Work with one rice paper wrapper at a time. Dip the wrapper in the hot water until it becomes soft, flexible and translucent. Gently shake off excess water.

Lay wrapper on flat surface. Place one tablespoon of the filling in a log shape on the bottom third of the wrapper.

Gently lift the bottom edge of the wrapper and fold over the filling. Fold in the sides of the wrapper. Gently roll up the wrapper until a small cylinder is formed, taking care to press out any air bubbles in the filling section. Be sure to press the edges with gentle pressure to seal the spring roll.

Repeat with remaining wrappers and filling. You will probably need to replenish the hot water a couple times as it cools down.

Makes 16 small spring rolls. Serve with dipping sauce.

TIP: If you don’t have any plain leftover chicken, you may use chicken canned in water or broth, or sliced chicken from the deli. Be sure to thoroughly drain the chicken if using canned. If using sliced chicken from the deli, ask for the slices to be extra thick so that the chicken doesn’t disintegrate when you chop it.

Bucatini Rigati with Artichokes & Prosciutto

January 8, 2009

This is another one of my recipes that was published previously on World Wide Webers.

There are a few universal truths in which I whole-heartedly believe: all babies are precious, what goes up must come down, and everybody likes pasta. So, because I already have all the babies I want and because I can’t control gravity (although that would be an awesome superpower to have), I present to you:

BUCATINI RIGATI WITH ARTICHOKES AND PROSCIUTTO

1 pound bucatini rigati (ridged, hollow spaghetti)

1/4 cup olive oil

3 tablespoons butter

1 tablespoon flour

1 cup chicken broth (reduced sodium) (I like Better Than Bouillon- find it in the soup aisle)

3-4 large garlic cloves, chopped

4 tablespoons chopped Italian flat leaf parsley

3 tablespoons lemon juice

1/4 teaspoon salt

1/4 teaspoon freshly ground black pepper

1 14 ounce can artichoke hearts packed in water, drained & sliced (NOT the marinated kind) (feel free to use thawed and drained frozen artichoke hearts)

4 tablespoons grated parmesan cheese

8 ounces prosciutto, chopped (if you don’t have prosciutto, try Virginia ham or pancetta)

1/4 teaspoon red pepper flakes (optional)

Put a large pot of water on high heat and bring to a boil. Feel free to season the water with a big pinch of salt.

Cook the pasta according to the package directions. Bucatini rigati usually takes about 6 minutes to cook until al dente.

Meanwhile, melt butter and oil in small saucepan over medium low heat. Stir until well combined.

Add flour, stirring until smooth. Cook for two minutes until thickened slightly.

Add chicken broth, stirring until fully incorporated.

Add garlic, parsley, lemon juice, red pepper flakes, salt and pepper. Cook for 2 minutes, stirring once or twice. Do not allow to boil.

Blend in cheese, stirring until smooth.

Fold in artichoke hearts. Cook for 3 more minutes. Stir a few times. Again, do not allow to boil.

Add prosciutto and stir carefully to avoid clumping up the prosciutto. If it does clump, no worries. Separate the clumps with a fork or just leave them. It will still taste good.

Lower heat and continue to cook until prosciutto is warmed through, about 5 minutes. If the pasta isn’t done yet, reduce heat to the lowest setting and cover the pot to keep the sauce warm. Stir every once in a while to prevent the proscuitto from sticking to the bottom.

Drain pasta thoroughly (do not rinse) and transfer to serving dish. Pour over sauce. Toss gently to spread sauce throughout the pasta. Serve immediately.

Serves 4 generously.

COOKING TIPS: You probably looked at the ingredients list and thought, “Holy crap! That’s a lot of stuff.” It’s not–I promise that this is a manageable recipe if you follow a few suggestions:

1. Put out your colander for draining the pasta and your bowl for serving before you begin cooking.

2. Measure and chop all of your ingredients before you begin cooking.

3. Start preparing the sauce as soon as you put the water on to boil.

4. If you forget to add an ingredient at the proper time, so what? Add it when you remember. If you forgot the garlic, I suggest adding a few extra minutes of cooking time to allow the garlic to cook through completely.

Ginger Chicken Noodle Soup

January 4, 2009


Chicken noodle soup, as we all know, is THE classic comfort food. Warming the body and soul on chilly days, soothing the aches and pains on sick days, and a mother’s best friend on picky-eater days. I freely admit that I have a fondness for Campbell’s, straight from the tin and zapped in the microwave. It’s an uncomplicated soup that reminds me of less complicated days. But when I am feeling a little more grown-up but still craving chicken noodle soup, I dress up a homemade version with fresh ginger and scallions. This Asian inspired soup is not only easy to prepare and low in fat, it tastes just as mmm mmm good as my beloved Campbell’s.

GINGER CHICKEN NOODLE SOUP

2 small boneless, skinless chicken breasts
5 whole black peppercorns OR Szechuan peppercorns
2 nickel sized slices of ginger AND 1 tablespoon minced ginger
1 garlic clove, crushed AND 2 garlic cloves, minced
4 scallions, chopped
1/2 cup bamboo shoots
1 tablespoon soy sauce
12 ounces of your favorite dried Chinese egg noodles
8 cups of low sodium chicken broth

Place chicken, peppercorns, slices of ginger and crushed garlic in a small saute pan with high sides. Add enough cold water to just cover the chicken. Place over medium heat and bring to a simmer. Poach chicken until cooked through and no longer pink in the center, about 10-12 minutes. Turn the chicken over halfway through the cooking time.

Discard the poaching liquid and spices.

Chop chicken into small, bite size pieces.

In a large soup pot, bring broth and remaining ginger and garlic to a boil. Cook egg noodles in boiling broth according to package directions.

One minute before noodles are finished cooking, add chicken, scallions and bamboo shoots to the soup. Stir gently to distribute chicken and vegetables throughout the pot.

Remove from heat and sprinkle with the soy sauce. Serve immediately.

Serves 4 very generously.

Roasted Pepper & Onion Salad with Smoked Paprika Vinaigrette

January 4, 2009

The supermarket was having a sale on red bell peppers so I bought way too many. My family will be eating red bell peppers with almost every dinner for the rest of the week. Sorry, guys! Fortunately, bell peppers are versatile so we won’t get too bored. They can be cooked just about any way and they take on many different seasonings so well. I also like how bell peppers add a mellow sweetness to any dish when they are sauteed or roasted. In this recipe, the sweetness of roasted peppers provides the backdrop for an assertive vinaigrette featuring smoked paprika and garlic.

ROASTED BELL PEPPER AND ONION SALAD WITH SMOKED PAPRIKA VINAIGRETTE

2 large red, yellow or orange bell peppers, seeded and cut in large wedges
1 large onion, peeled and halved
3 cups of baby spinach
3 tablespoons extra virgin olive oil
1 tablespoon red wine vinegar
1 teaspoon smoked paprika
1/4 teaspoon sea salt
1 garlic clove, mashed into a paste
1 tablespoon chopped cilantro or parsley

In a large bowl, whisk together the oil, vinegar, smoked paprika, salt and garlic.

Turn on the broiler to its highest temperature.

Place the peppers, skin side up, and the onions, cut side down, on a baking sheet. Broil 5-7 inches away from the heat for about 10 minutes, until the peppers and onions are charred and have softened.

Place peppers in a bowl and cover with plastic wrap for 10 minutes

Remove onions to a cutting board while still warm. Take off the blackened outer skin and discard. Cut the onion into small wedges. Add onions to vinaigrette.

Remove peppers from bowl while still warm. Carefully peel off the charred skins and discard. Cut the peppers into strips and add to vinaigrette and onions.

Toss peppers and onions in vinaigrette until coated.

Arrange the spinach on a serving platter. Spoon the peppers and onions on top of the spinach. Drizzle over any vinaigrette remaining in the bowl.

Garnish with cilantro.

Serves 4 as a side dish or 2 as a light lunch.